|
<< Click to Display Table of Contents >> Weather Station Setup |
  
|
|
<< Click to Display Table of Contents >> Weather Station Setup |
|
Laguna offers multiple weather input options including on-site Weather Stations, and internet based CIMIS and ZipET.
Note that CIMIS is only available in California.
To set up CIMIS or ZipET:
1.From Laguna desktop, click on the Setup menu. Select Weather Station.
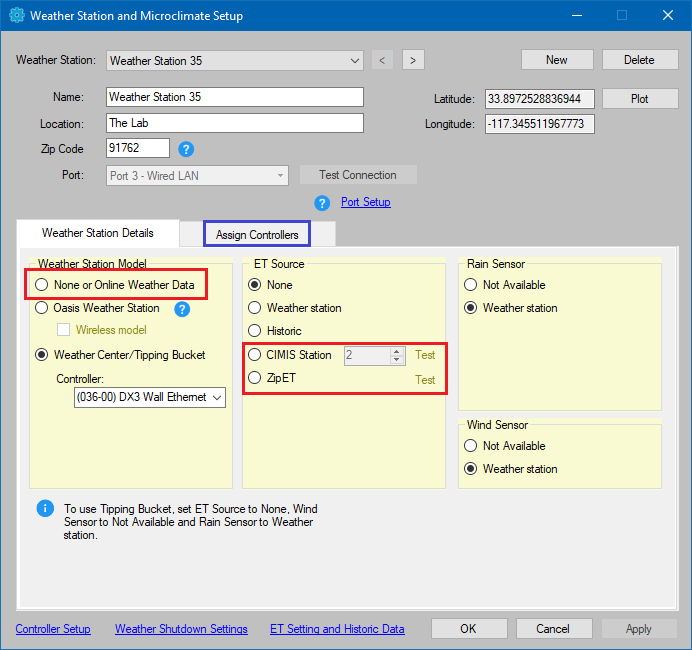
2.Click on New. This will open up a dialog box to name the weather station and identify a location and zip code. Click Apply
3.Find the Weather Station Details tab
4.Set the Weather Station Model to None or Online Weather Data
5.Set the ET Source to CIMIS or ZipET.
You must find the CIMIS station number for your region using the CIMIS website. Enter the number where indicated.
For ZipET, the zipcode for your weather station is used.
6.Click Test to confirm that the station you selected is online. An internet connection is required.
7.By default, the Rain and Wind Sensor will be set to Not Available.
8.Select the Assign Controllers tab.
9.Assign controllers to the weather station by checking boxes by controllers in the left column and clicking on Add.
10.It's a good idea to Plot the weather station on the map. Click the Plot button and click a location on the map. The position isn't important since a physical weather station is not present. Plotting a weather station correctly is useful because it allows controllers assigned to the ZipET microclimate to be easily identified. See Basic Map Navigation tips.
NOTE: Controllers can not be assigned to two different weather stations, but a controller can use ET data, Rain Shutdown settings and Wind Shutdown settings from different weather stations. See Controller Setup.