|
<< Click to Display Table of Contents >> Controller Setup |
  
|
|
<< Click to Display Table of Contents >> Controller Setup |
|
Many functions of Laguna Controller Setup mimic those of Oasis, however, there are a few new features:
From Laguna desktop,
1.Click on the Setup menu. Select Controller.
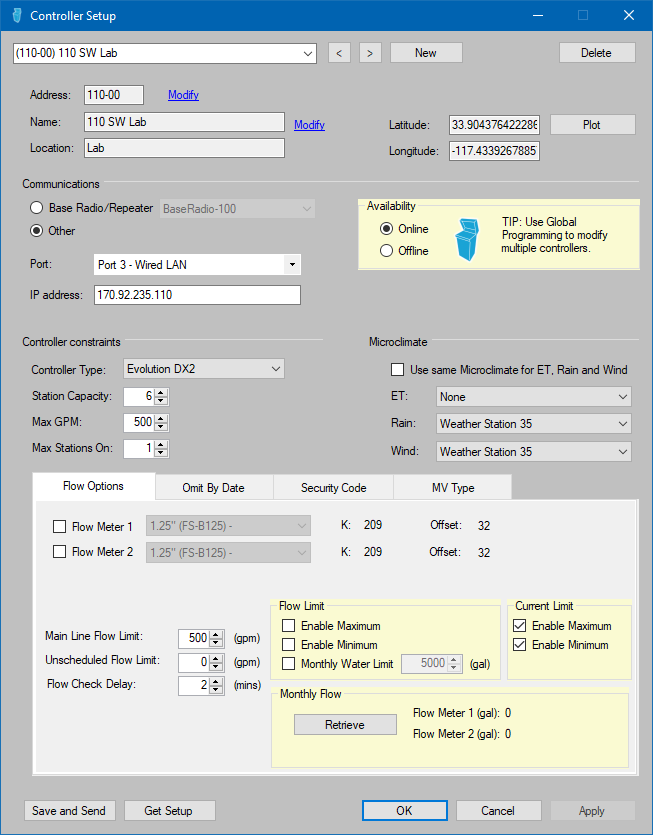
2.New Satellite View allows for accurate plotting of controllers. Use the Plot button to relocate the controller. Click mouse on correct location on map.
Note: If you don't plot the controller, the default location will be the same as that of Central PC.
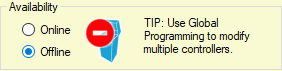
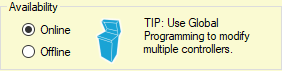
3.Online/Offline – An “Offline” controller no longer generates alarms with every Scheduled Event communication. Therefore the Online/Offline setting can be used to reduce communication-failure-related communication delays.
4.Communication Options can easily be set/reset. Once “Ports” are assigned to particular communication types, a controller can be assigned to the correct path by selecting it from the Port drop-down.
5.Controller Constraints identify the type of controller to Laguna. It is very important to make sure that the controller type and station count is correct and matches the field.
Note: It is strongly recommended to use the Get Setup feature to synchronize the controller settings with settings in Laguna. Click on the Get Setup button. Once values are received, click Apply to save.
It is possible to use weather inputs from different sources for an individual controller. “Use same Microclimate for ET, Rain and Wind” is selected by default. To use different sources such as ZipET and an on-site tipping rain bucket:
1.From Laguna desktop, click on the Setup drop-down. Select Controller.
2.Locate the “Microclimate” section and un-check the “Use same Microclimate . . “ box.
3.Use drop-downs to select each source for ET, Rain and Wind. Weather devices must be created in Setup-Weather.