|
<< Click to Display Table of Contents >> Installing Laguna On Windows Server |
  
|
|
<< Click to Display Table of Contents >> Installing Laguna On Windows Server |
|
Before you start, see Minimum Computer Specification and System Prerequisites for details about the computer and operating system requirements.
The following procedure describes the installation for Windows Server 2016, the same process can be used for Windows Server 2019.
1.Ensure Windows Server 2016 is updated to the latest version before proceeding to install Laguna on the system. To install updates, go to Settings -> Update & security -> Windows Update tab. Click on ‘Check for updates’ or ‘Install now’.

2.Once the Windows updates have been installed, the computer will have to be rebooted.
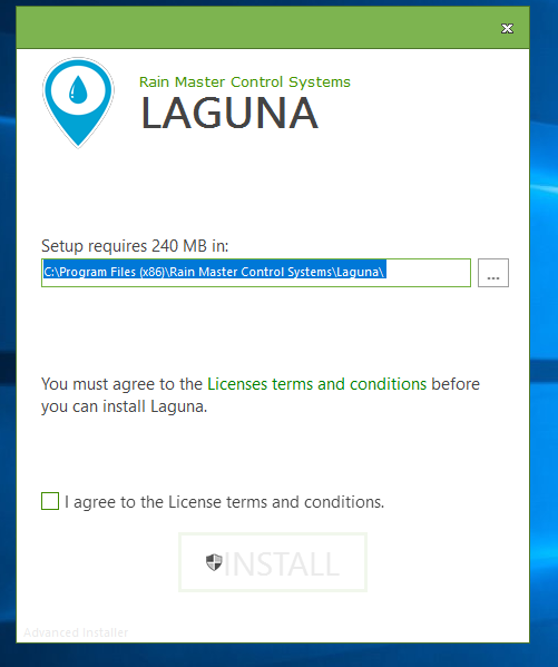
3.Once, the computer has been rebooted, run LagunaInstall.exe (or LagunaInstall-x64.exe for 64-bit version)
4.The Prerequisites window pops up.
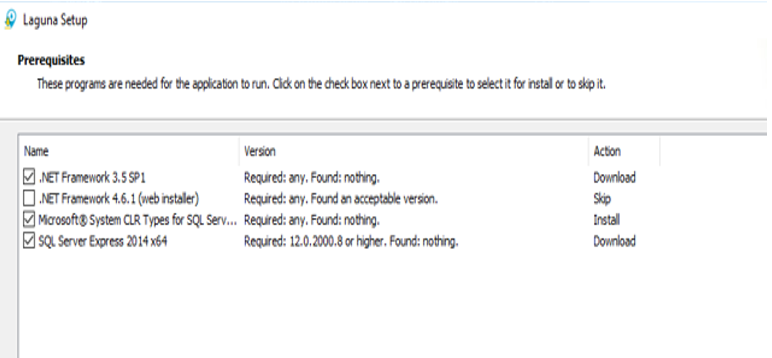
5.Install the required prerequisites.
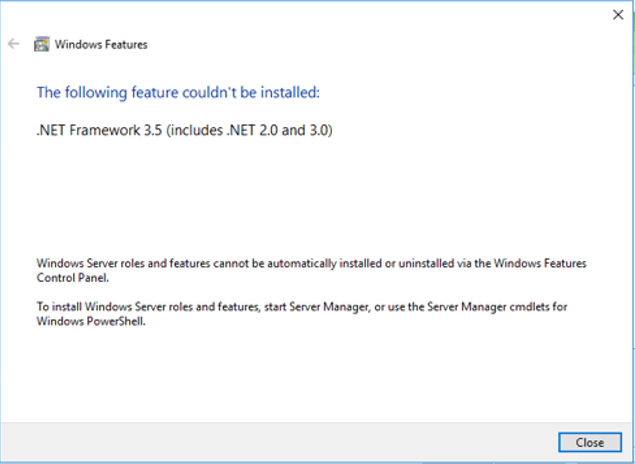
6.While trying to install .Net Framework 3.5, the following message box might pop up. [Usually when the computer is rebooted after all the prerequisites have been installed, .Net Framework 3.5 should also be successfully installed]. Hit close and continue with the prerequisites installation.
7.Once the prerequisites have been installed, the computer will have to be rebooted.
8.Once the computer has been rebooted, Laguna installer will start up.
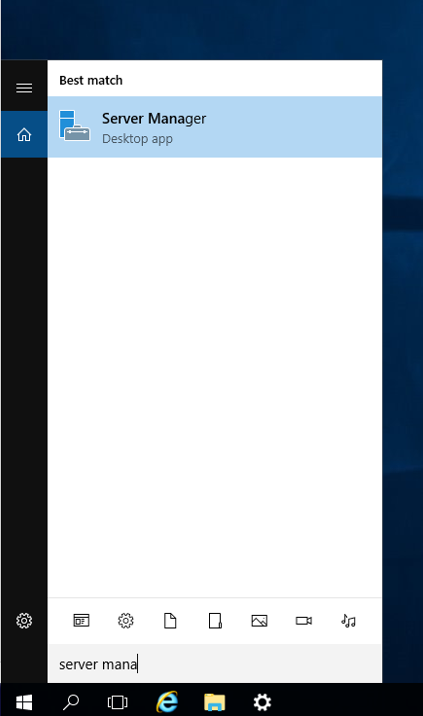
9.Before continuing with the Laguna installation, make sure .Net Framework 3.5 and .Net Framework 4.6 have been installed correctly. To ensure these have been installed, do the following:
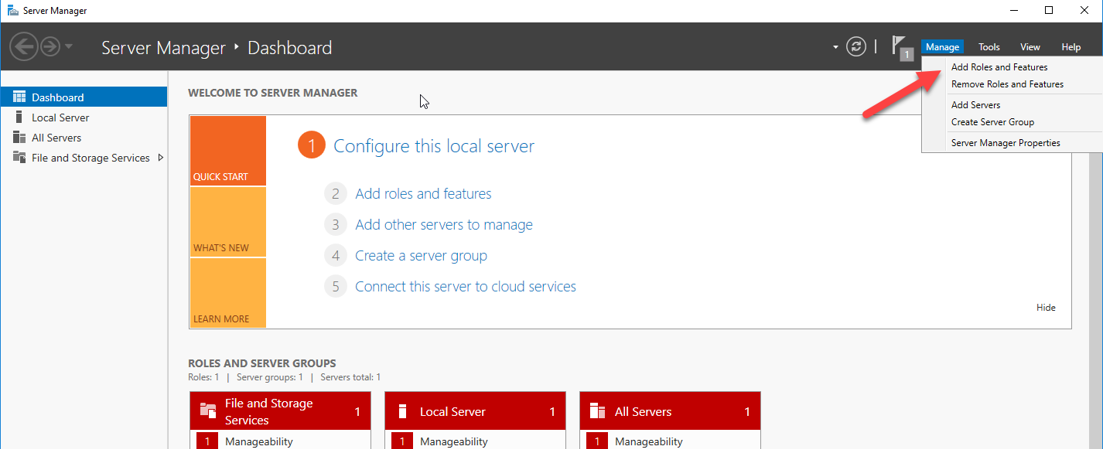
•Open up Server Manager.
•Go to Manage(on top right corner) -> Add Roles and Features
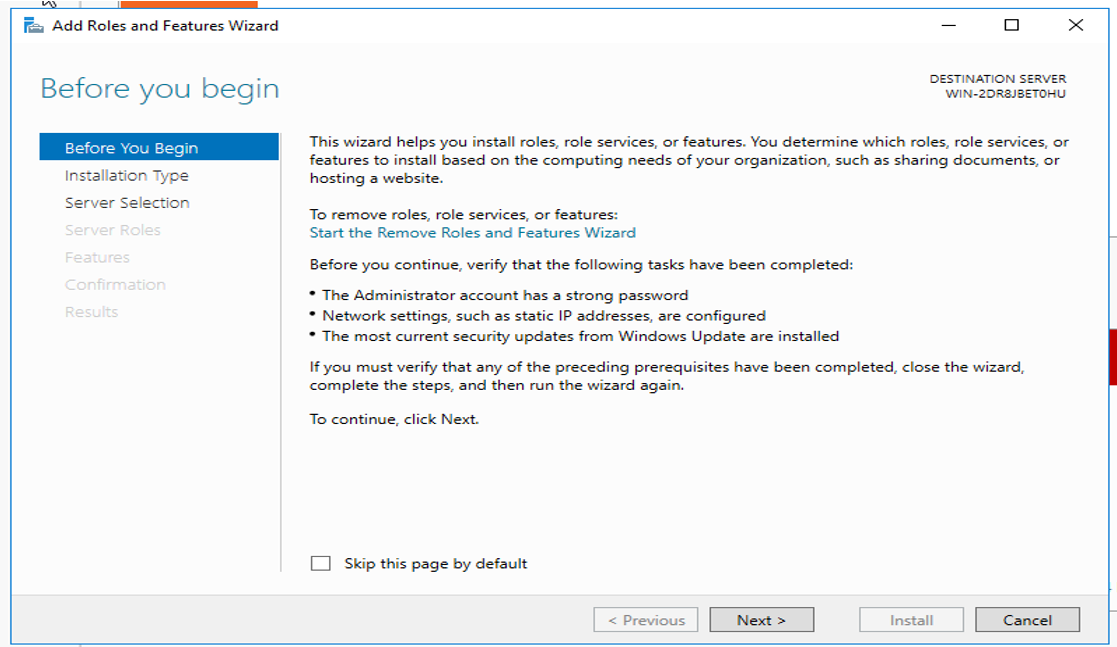
•The ‘Add Roles and Features Wizard’ opens up
•Hit Next until you reach the Features tab. .Net Framework 3.5 and .Net Framework 4.6 should be installed.
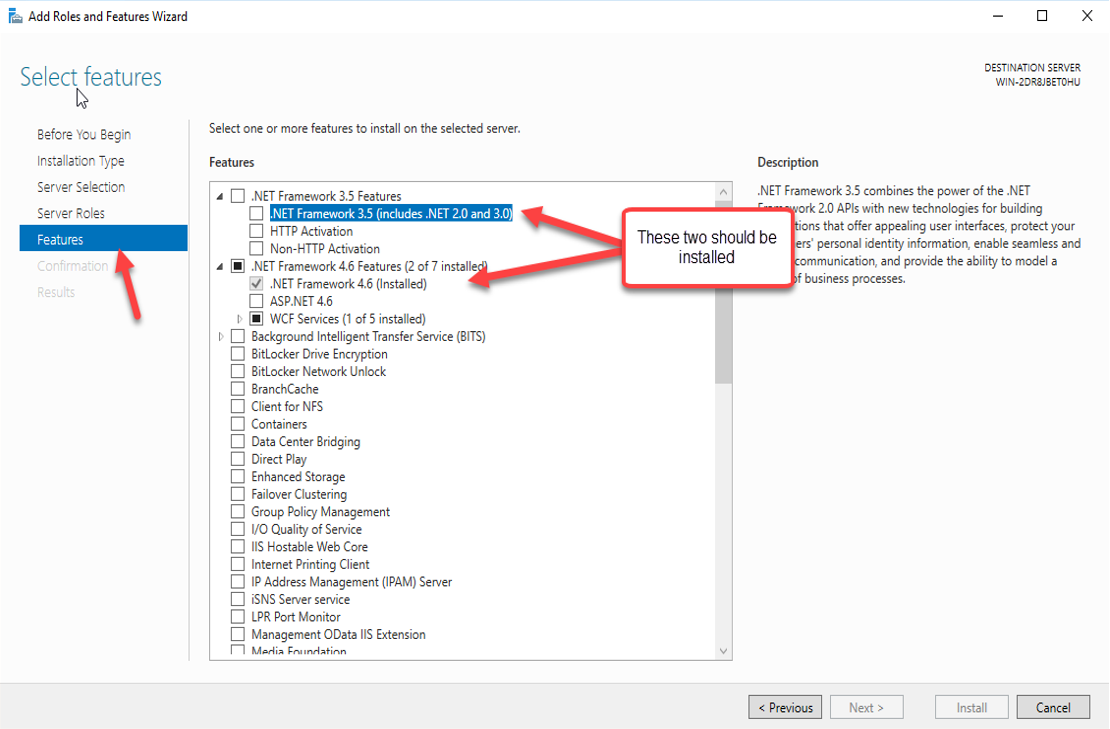
•If they are not already installed, select the check-box against which ever is not installed and hit Next.
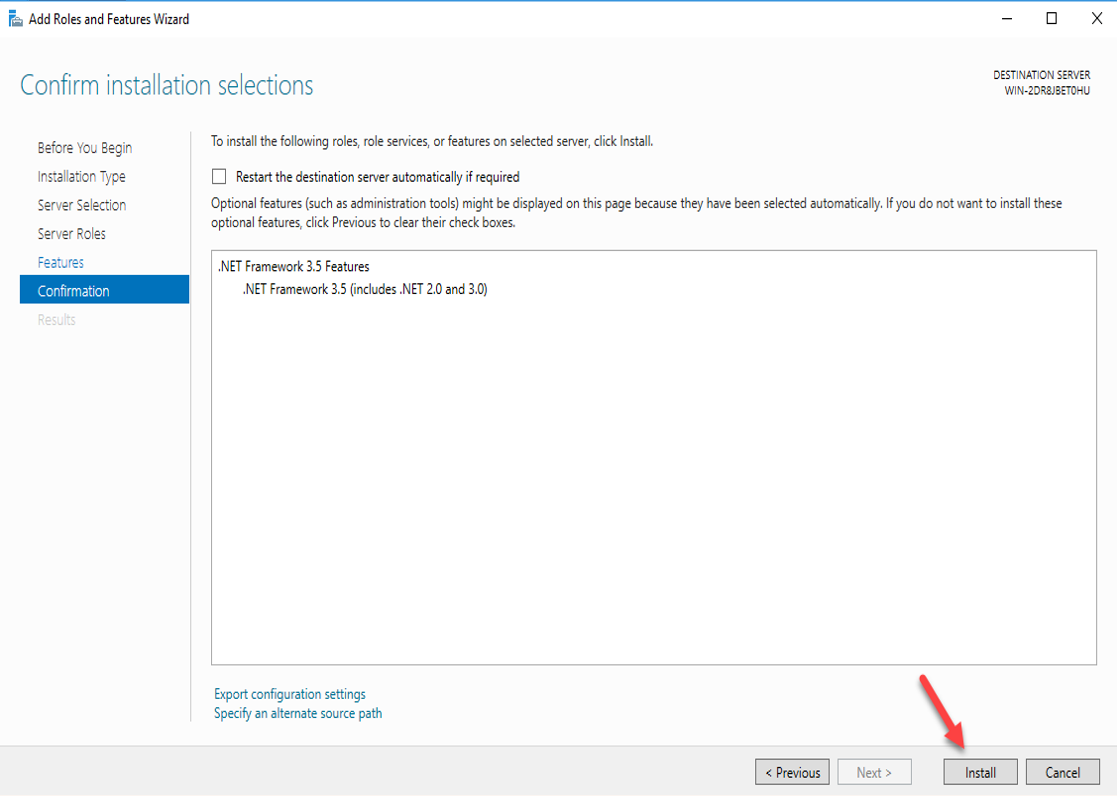
•Hit Install
10. Once everything has been installed correctly, you can now continue with the Laguna installer.